Let's say that you run a mental health counseling service. It's a marketplace, and you have counselors who serve the patients. Let's say that you pay 70% of the fee paid by the patient to the counselor.
Traditionally, you will encounter two issues while running a marketplace like this. First, at the month's end, you need to calculate which counselor gets paid and how much. Secondly, when you pay the counselors, you incur the transaction fee.
NeetoCal's Split Payment feature solves both of these problems. While setting up the Split Payment feature, you can mention that you would like 70% of the payment to go to the counselors' account. Now, NeetoCal will automatically split the payment between you and your counselors whenever the client makes a booking. Your counselor will get 70% of the money; the rest will come to you.
In this example, we considered a mental health counseling service. The same scenario can play out if you manage a yoga studio, a health clinic, a beauty clinic, a chiropractor service or any other marketplace.
The folks who provide the actual service would be called Service Providers in this article. In the example above, counselors were the "service providers". Depending on your business, the service providers could be musicians, technicians, personal trainers, therapists, travel agents, etc.
Enabling split payment
To ensure that split payment works, we must go through many steps. Let's go through all of them one by one.
1. Admin setting up stripe account
Visit the Stripe Connect page.
-
Stripe will ask you to configure Connect if you have not configured it yet. Make sure you have completed the following and have a green tick on the left of each.
Verify email.
Complete your profile platform.
Add business details to activate your account.
-
Visit the Connect Settings page. Under Branding on the Appearance section, update the following details and click on the Save branding changes button.
Icon: Stripe's recommended size is 128 px by 128 px.
Logo: Stripe's recommended size is 1000 px by 200 px.
Brand colour
Accent colour
You can see a preview of the changes on the left. These branding details will appear in the Stripe onboarding flow for your workspace members when they connect their Stripe accounts.
Visit the Automatic payout page in Stripe.
Under Payout Schedule, switch from Automatic to Manual.
Click on the Save button. We do this to make enough funds available in your platform account to send the split payments to your workspace members
Click on API keys.
Click on Create a secret key.
It will ask for a key name.
Enter the split payment for NeetoCal.
Copy the API key shown in the modal and save it properly. This value will not be shown again. This is the secret key which will be used later.
There will be a row with the name Publishable Key just above the newly created row. Click on the value under the column Token. This will be the publishable key value to be used later.
Click on account settings.
At the top right corner, you will see a value that starts with acct_. Note this value. This will be the Identifier value to be used later.
Now login to your NeetoCal account.
Configuring Split payment in NeetoCal
Click on Admin Panel from the left-side panel.
Click on the Payment integrations tab on the side pane.
Click on the Stripe Split Payment card.
Click on Connect Stripe platform.
Enter the Secret key, Publishable key and Identifier.
Click on the Connect button.
2. Setting up stripe account for the Service providers
Service providers are the people who will actually provide the service. Here are the steps you (the workspace Admin) needs to take to set up the service providers.
You (the workspace Admin) should ask your workspace members (the service providers) to connect their Stripe by following this doc. Then, their Stripe accounts can be used to receive their share of the payment.
3. Setting up split payment settings for a meeting
You (the workspace admin) should log into NeetoCal account.
Click on the Scheduling links tab from the left-side panel..
Create a new scheduling link and fill out the necessary information.
Click on the Settings tab.
Click on Split Payment.
To add a new split configuration for a meeting member, click on the
(+)button.The list will show only the people who have connected their Stripe account and are the hosts of this meeting.
-
Two types of splits are available:
1. Percentage: This type of split calculates the distribution based on a percentage of the total amount.
2. Fixed: With this option, you can allocate a fixed amount in the currency of your choice. This fixed amount will be deducted from each meeting payment.
Once you have configured split payments, click on Save changes.
That's it! You are all set now. From now on, anytime a client makes a payment, the payment will be split between the admin and the service provider.
Payment methods
Currently, NeetoCal supports three payment methods within Stripe:
Cards
Google Pay (except in India)
Apple Pay (except in India)
Check which cards are supported in Stripe.
Activating Google pay in Stripe Split payment
NeetoCal does not automatically activate Google Pay for Stripe split payments. You need to manually activate it.
Click on Admin Panel from the left-side panel.
Click on Payment Integrations.
Find the Stripe Split Payment card and click on Manage Stripe platform button.
You can see the details of your connected Stripe Split payment account.
Click on the Stripe Dashboard button.
Your Stripe dashboard will open in a new tab.
-
Click on the Settings icon at the top-right corner.

In the dropdown menu, select Settings.
-
On the Settings page, you will find the Payments card under Product Settings.
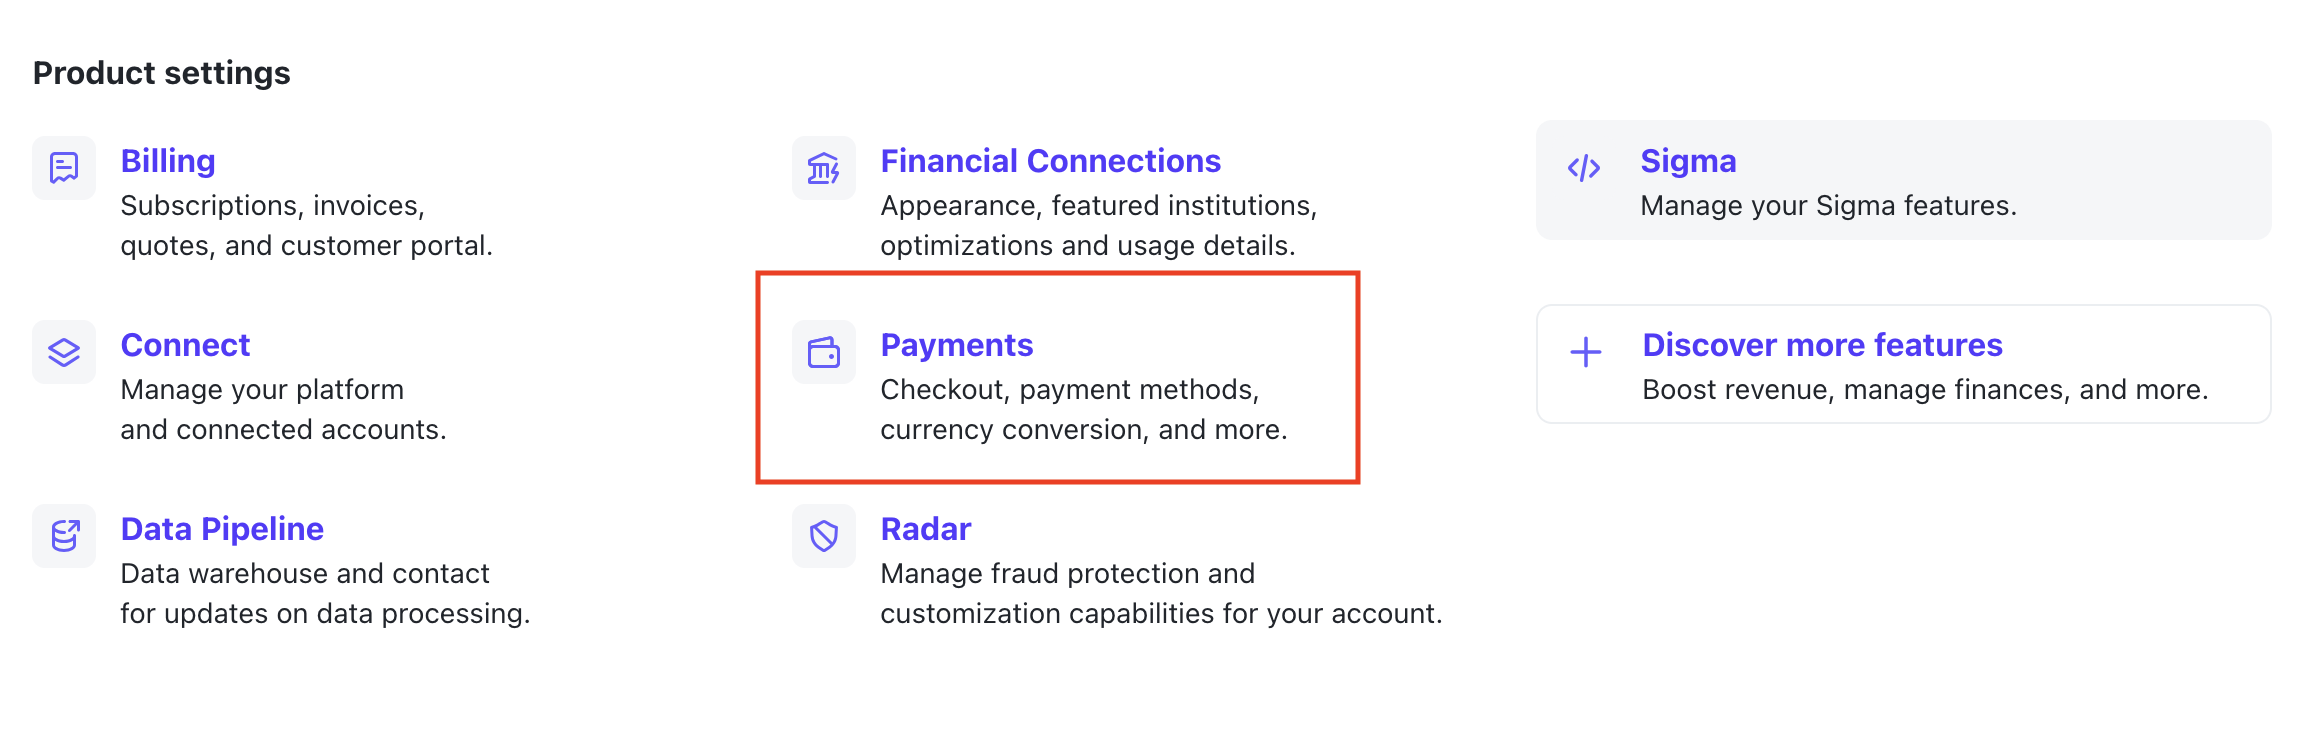
Click on the Payments card.
Navigate to the Payment Methods tab.
-
Find the Payment Method Configuration section with the subtitle Your Configuration and click on it.

Under the Wallets section, find the Google Pay option.
-
Check its status:
-
If it is active, Google Pay is already enabled.

-
If it is inactive, you will see a Turn On button. Click on it to enable Google Pay.

-
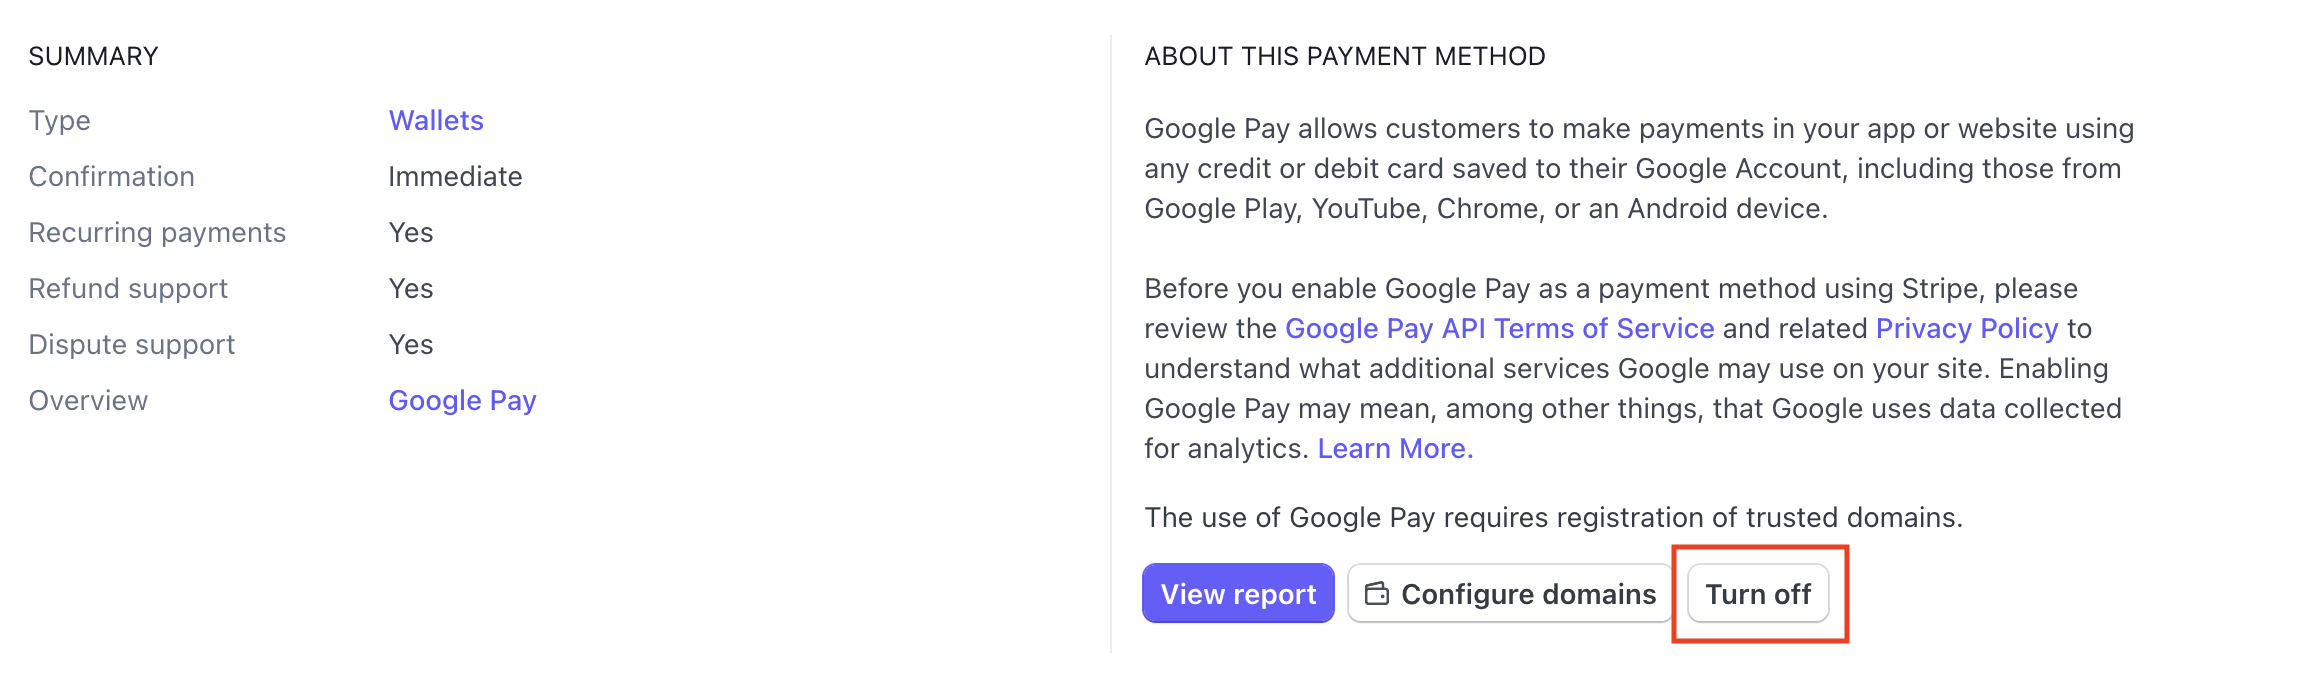
To disable Google Pay, click on Google Pay to view its details.
-
Then click on the Turn Off button on the right side.
Activating Apple pay in Stripe Split payment
NeetoCal does not automatically activate Apple Pay for Stripe split payments. You need manually active it.
Click on Admin Panel from the left sidebar.
Click on Payment Integrations.
Find the Stripe Split Payment card and click on Manage Stripe platform button.
You can see the details of your connected Stripe Split payment account.
Click on the Stripe Dashboard button.
Your Stripe dashboard will open in a new tab.
-
Click on the Settings icon at the top-right corner.
In the dropdown menu, select Settings.
-
On the Settings page, find the Payments card under Product Settings.
Click on the Payments card.
Navigate to the Payment Methods tab.
-
Find the Payment Method Configuration section with the subtitle Your Configuration and click on it.

Under the Wallets section, find the Apple Pay option.
-
Check its status:
-
If it is active, Apple Pay is already enabled.

-
If it is inactive, you will see a Turn On button. Click on it to enable Apple Pay.

-
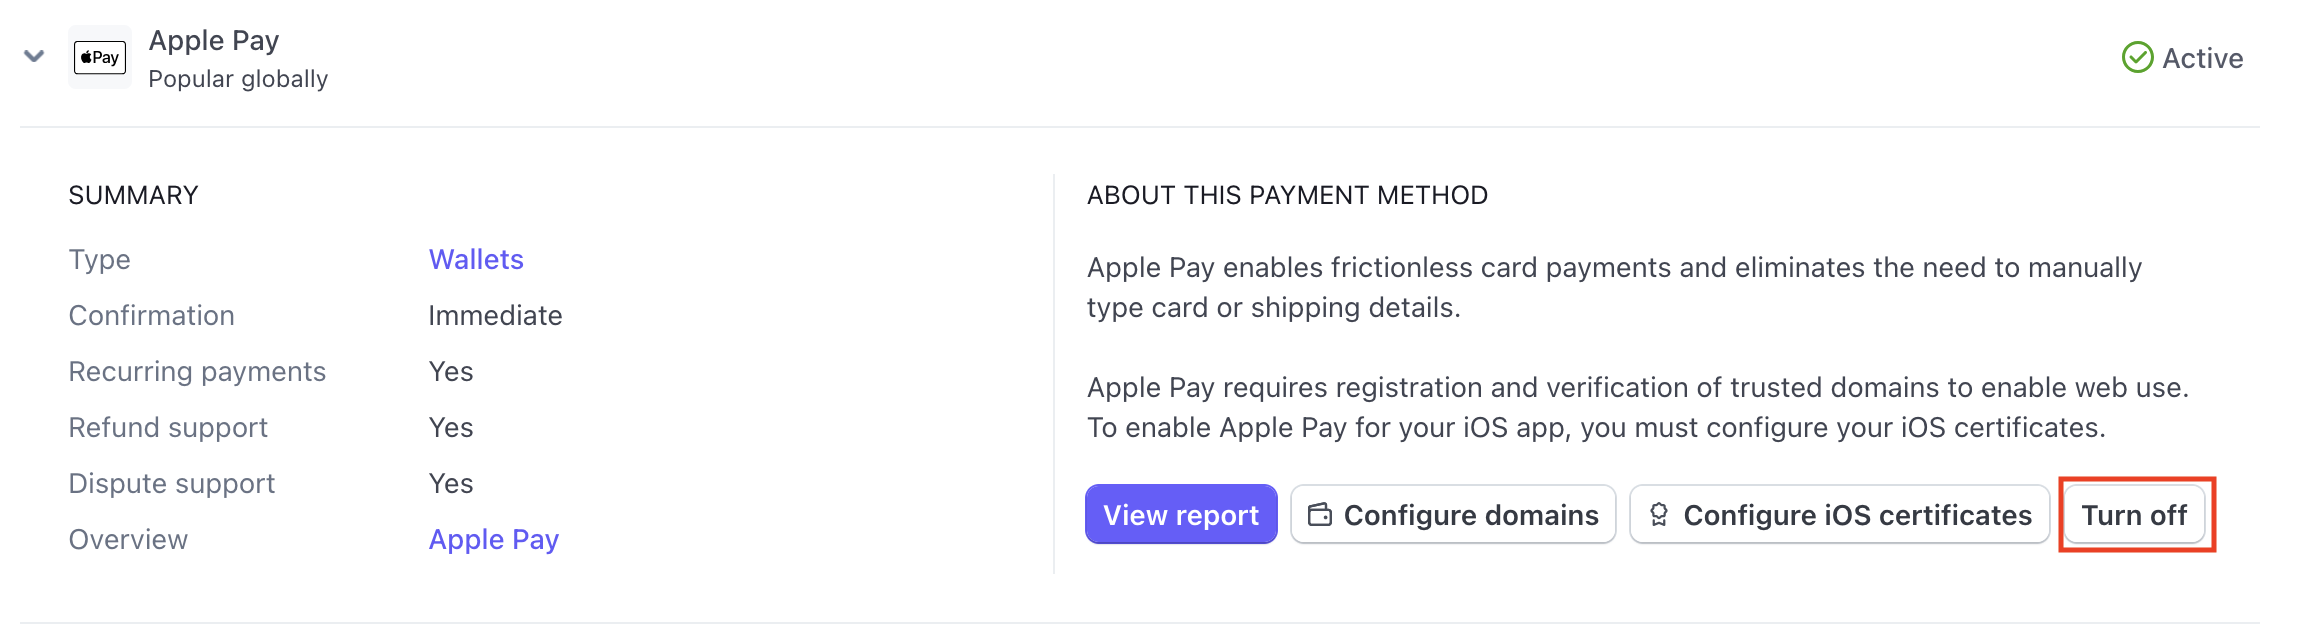
To disable Google Pay, click on Apple Pay to view its details
-
Then click on the Turn Off button on the right side.
In split payment, who gets the money and when?
Let's take an example to understand how money moves in the case of a split payment. Let's say that on Oct 6, the client makes a payment of $80. Here the client booked the meeting for Oct 9 for 3-4 PM.
The moment the client makes the payment, the admin will see a Stripe transaction of $80. So, the admin gets the money in their Stripe account immediately after booking. The admin will retain this amount until the meeting ends on October 9 at 4 PM.
When the meeting ends at 4 PM on Oct 9, NeetoCal will make a request to Stripe to transfer the service provider's share of the amount from the admin account. Let's assume that, in this case the service provider gets 80% of the total payment. So NeetoCal will ask Stripe to transfer $64 from the Stripe account of Admin to the Stripe account of the Service provider.
When the client paid $80, the admin didn't get the complete amount($80), because the admin needs to pay the Stripe transaction fee. But when NeetoCal requests Stripe to transfer $64 from the admin account to the service provider account, Stripe doesn't take any transaction fee since it's a transfer from one Stripe account to another Stripe account.
What is payout?
In the last example, we saw that when a client makes a booking, the admin account sees a Stripe transaction. However, it doesn't mean the admin can instantly use that money. A few days later, Stripe will transfer the money from the admin's Stripe account to the admin's bank account. This is called payout.
As per Stripe, the first payout can take a while. Please read this documentation from Stripe to learn more about their payout schedules.
What happens when a booking is canceled?
When a booking is canceled, the client may or may not be refunded , depending on the admin's refund policy.
Which countries support Stripe split payments?
NeetoCal supports all countries that Stripe supports, excluding Indonesia. Here is a list of the countries that Stripe supports.
Stripe demands that the country of the admin account be the same as the country of the service provider's Stripe account. This means that if the admin's country is the USA, then the service provider's country cannot be Mexico or Canada.
However, there is more flexibility for the Single Euro Payments Area (SEPA) countries. For example, if the admin's country is Portugal, then the service provider's country can be Belgium since both countries come under SEPA.
What happens when a 100% discount code is used?
If a client books with a 100% discount code, NeetoCal will still initiate a split transfer to the host of the scheduling link. Please ensure your Stripe platform account has enough balance for this.
Example scenario of how this is useful
Suppose your therapy business has an agreement with an institution to provide therapy sessions for their employees. The institution pays you in bulk, allowing their employees to access your therapy services. These employees can use a flat 100% discount code when booking sessions with your therapists. Previously, you had to manually pay out the therapists for sessions booked with the 100% discount code. With NeetoCal, this process is now automated.
Initiating payouts to bank account when stripe payout schedule is set to manual
Admin can configure payouts from NeetoCal dashboard. Please follow the below steps
Go to Admin Panel on the left-side pane.
Click on Payment integrations on the left-side pane.
Click on the Stripe Split payment card.
Click on the Manage Stripe platform button, and you can see your account details.
-
Choose any of the following options:
Automatic
Manual
Click on Save changes.
Automatic
NeetoCal will automatically determine the maximum safe payout amount and initiate the payment to your bank account at regular intervals.
Manual
You have to manually calculate the maximum safe payout amount and create a payout from the Stripe dashboard. To calculate the maximum safe payout at a given time we need the following values:
Available to pay out to your bank - Visit the Stripe dashboard balance and note down the value.
-
Sum of pending split payment amount - Follow the below steps to find this value.
Click on the Payments menu from the sidebar.
Click on the Stripe split transfers submenu from the sidebar and you can see the list of all split transfers.
Click on the Pending tab to filter the list of pending splits.
Click the ⬇️ Download icon to export the table as a CSV file and use formulas to calculate the sum of the pending split payment amount.
Once you have all the values mentioned above, use the following equation to determine the maximum safe payout amount.
Maximum safe payout amount = ( Available to pay out to your bank - Sum of pending split payment amount )To initiate a payout to your bank account, follow these steps:
Visit the Stripe balance dashboard.
Click on the Payout funds button.
Enter the calculated maximum safe payout amount.
Click on the Payout button.
Currency used for split payment transfers
The split payment will be made in your platform account’s settlement currency, regardless of the meeting price currency. For example, if the scheduling link is priced at 30 BRL with a 20% split configured for a service provider, and your platform’s settlement currency is EUR, then the 30 BRL will first be converted to EUR. The 20% split will then be calculated on the converted amount and transferred to the service provider in EUR.