
Your Outlook or Microsoft 365 calendar can automatically manage availability based on your calendar events. This ensures that you never get booked during blocked or busy times in Outlook.
Go to Host (Self) tab.
Under Calendar integrations, select Outlook/Microsoft 365 Calendar.
Choose your connected Microsoft Outlook account from the list.
Make sure to select your preferred calendar under Choose calendars to which meeting should be added.
Select the checkboxes for the time slots that should be excluded from your availability:
Busy, Away/Out of office, Tentative, and Working elsewhere.Select all the calendars that NeetoCal should check for your availability under Check for double booking.
Click Save changes to apply the preferences.
If you want to connect another calendar account, click the Add a calendar account link and follow the same steps. If you want to know more about customizing your event preferences, please check out this article.
How does Neetocal check sync on your Outlook Calendar?
When Outlook Calendar event is created, it automatically updates in Neetocal. Neetocal gets a signal (called a 'webhook') from Outlook. In rare cases, Outlook might miss sending this signal. Therefore, Neetocal also checks for reliability updates every three hours. You can also manually re-sync calendars from Admin panel.
Calendars not visible error
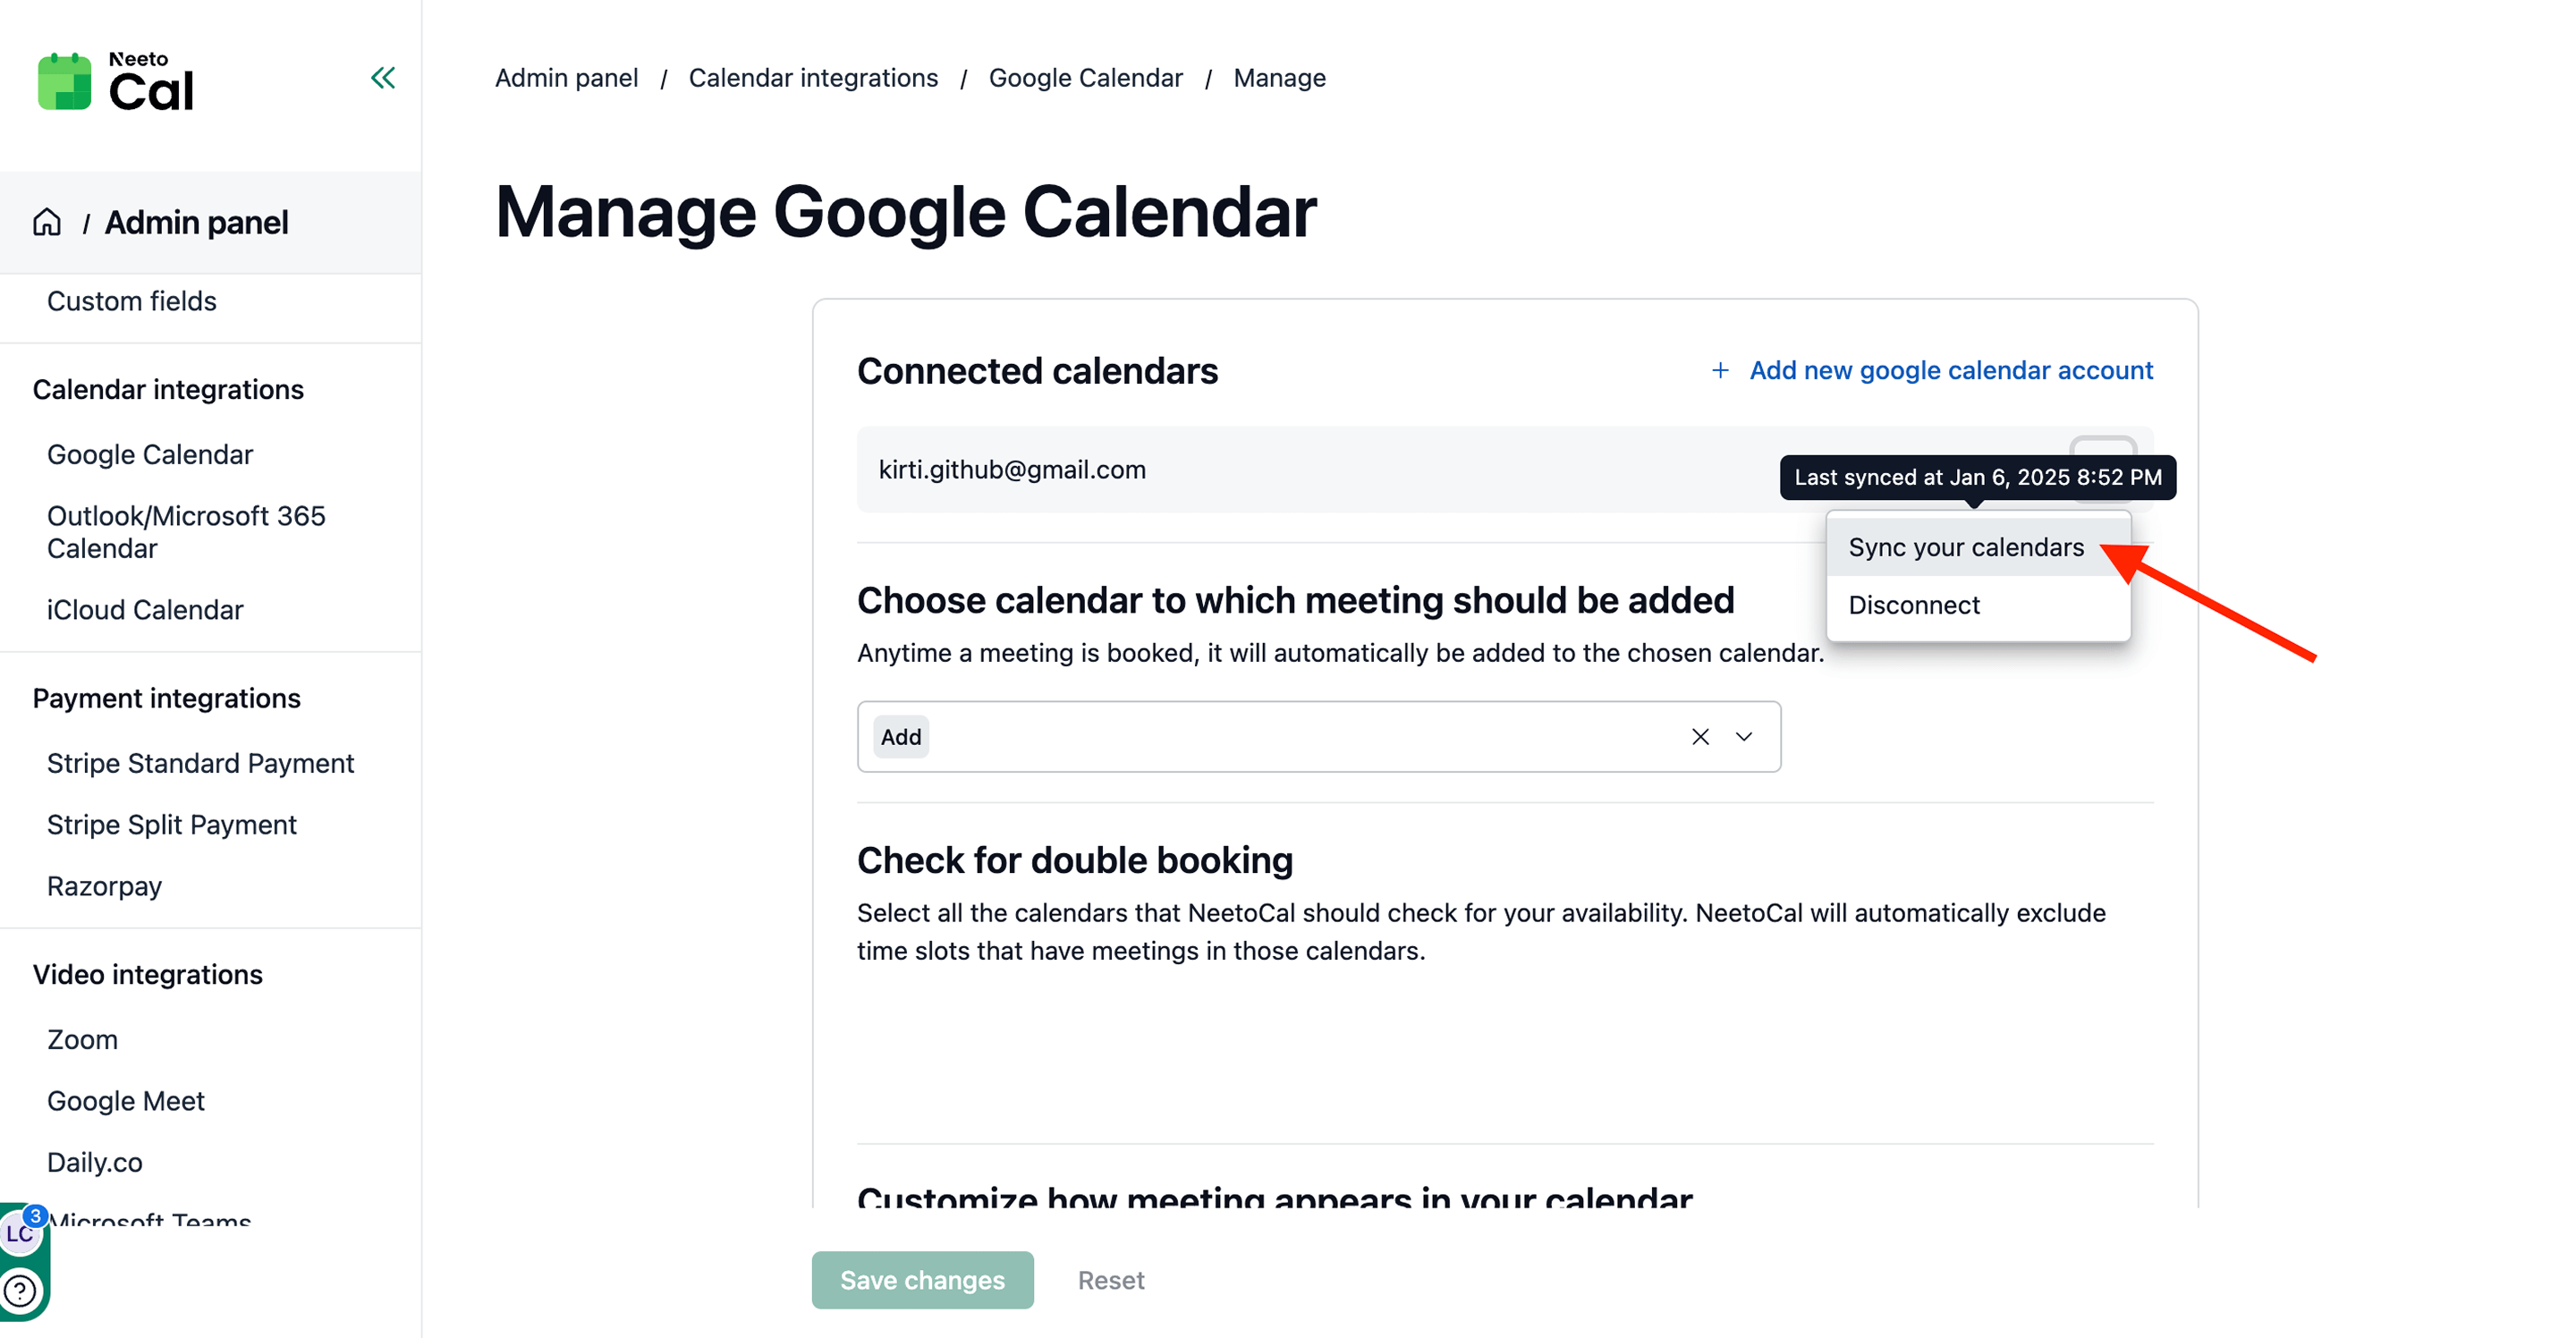
If your account integration is successful, but it shows a loading indicator for a long time, please click on the sync your calendars option from the "three-dot" menu next to your account.
.png)
Account connected but manage page not accessible
If NeetoCal shows that your account has been connected successfully but you are unable to access the manage page, you have likely not accepted the necessary permissions in the Microsoft integration screen. In this case, we will automatically disconnect your account and send you a reauthorization email. Please click on the link in the email to reconnect your account.
Microsoft 365 error guide
If you're using a Microsoft 365 account and the integration with NeetoCal fails, you'll be sent back to the NeetoCal page, and your account won't be connected.
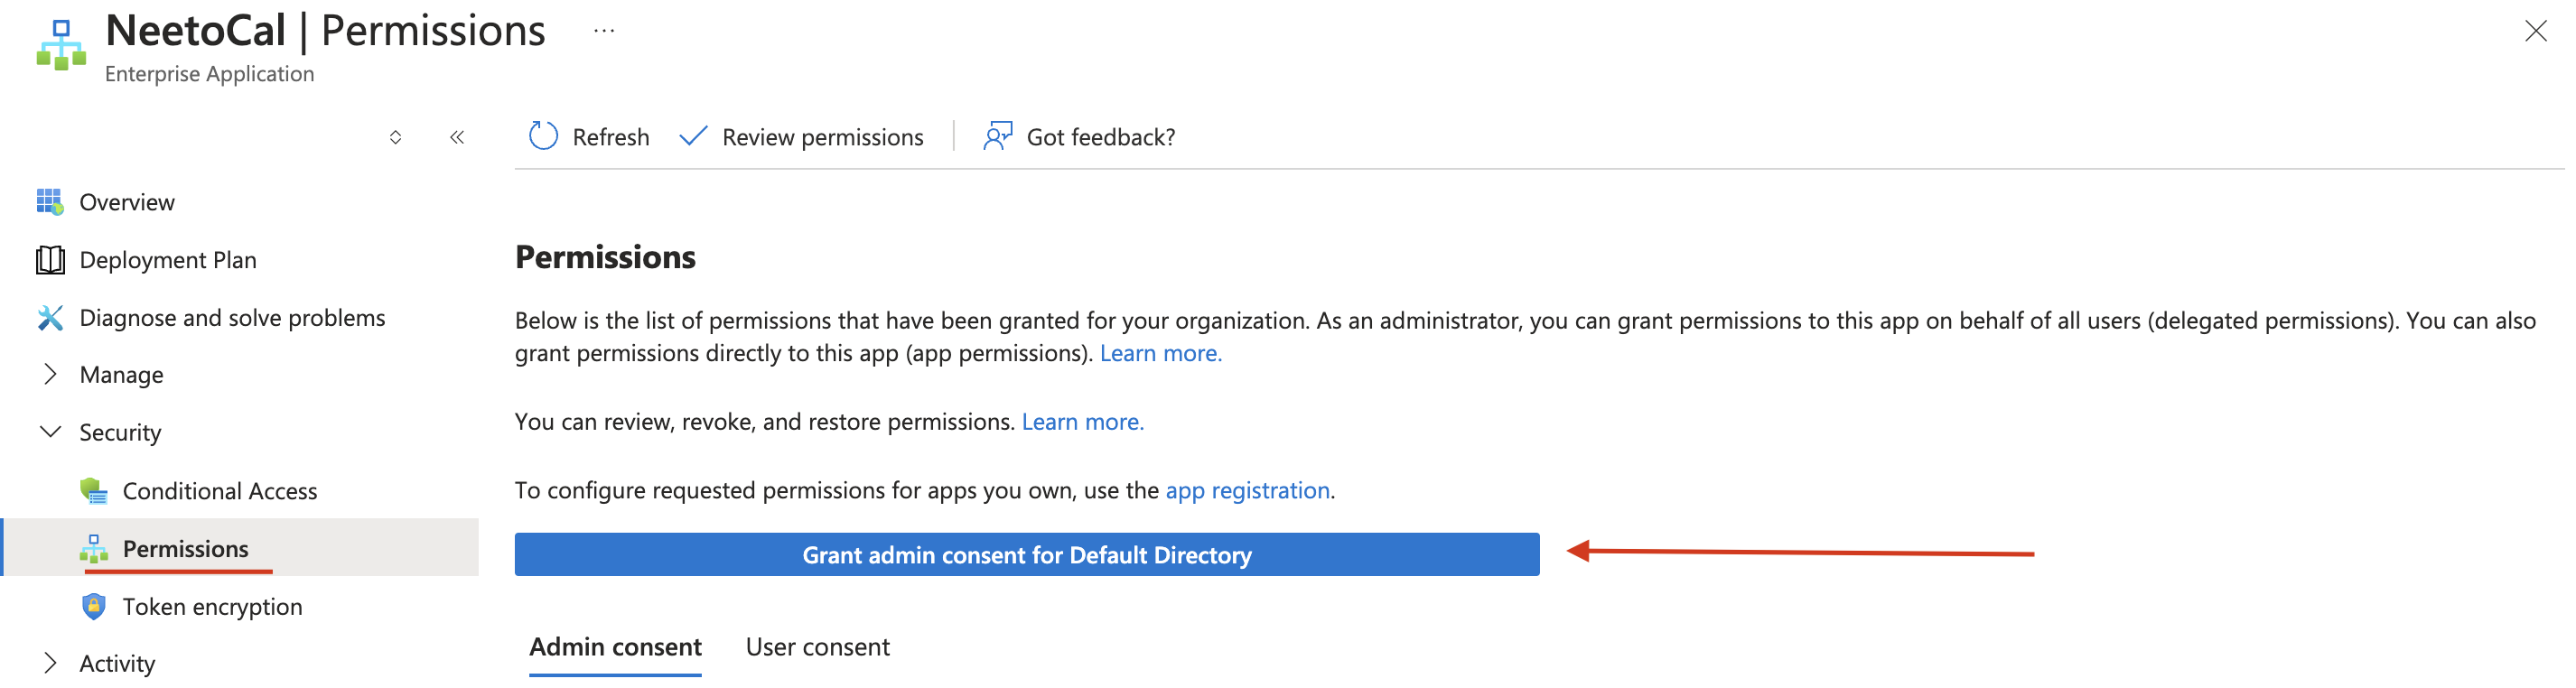
When this happens, your IT Admin will need to grant NeetoCal the necessary permissions in the Azure portal.
Providing permissions to NeetoCal in Azure portal
Login to the Azure portal at portal.azure.com.
-
In the top search bar, search for Enterprise Applications.

Open Enterprise Applications and you will find NeetoCal in the list.
Open the NeetoCal app and grant access to your organization.
Does NeetoCal know the event details or just that slot is taken
When outlook/Microsoft calendar is integrated with NeetoCal then NeetoCal gets access to all your calendar events. So NeetoCal not only knows that a particular slot is taken but it also knows the meeting title. We need that information so that we can accurately show you in troubleshooting why a particular slot is not available.