
NeetoCal supports UPI QR code payments through Razorpay.
But if your Razorpay account isn't approved, or you're running into issues with Razorpay, you can still collect UPI payments manually by sharing your UPI QR code directly with clients with no Razorpay integration needed. Once they complete the payment, you can verify the transaction on your end.
Setting up UPI payment
Go to Admin panel.
Go to Payment integrations.
Click on UPI card.
Click on Connect UPI.
Enter UPI id. You can add multiple UPI ids to receive payments from different sources for different scheduling links.
Now, open the booking page.
Book a slot.
You will be directed to the payment page.
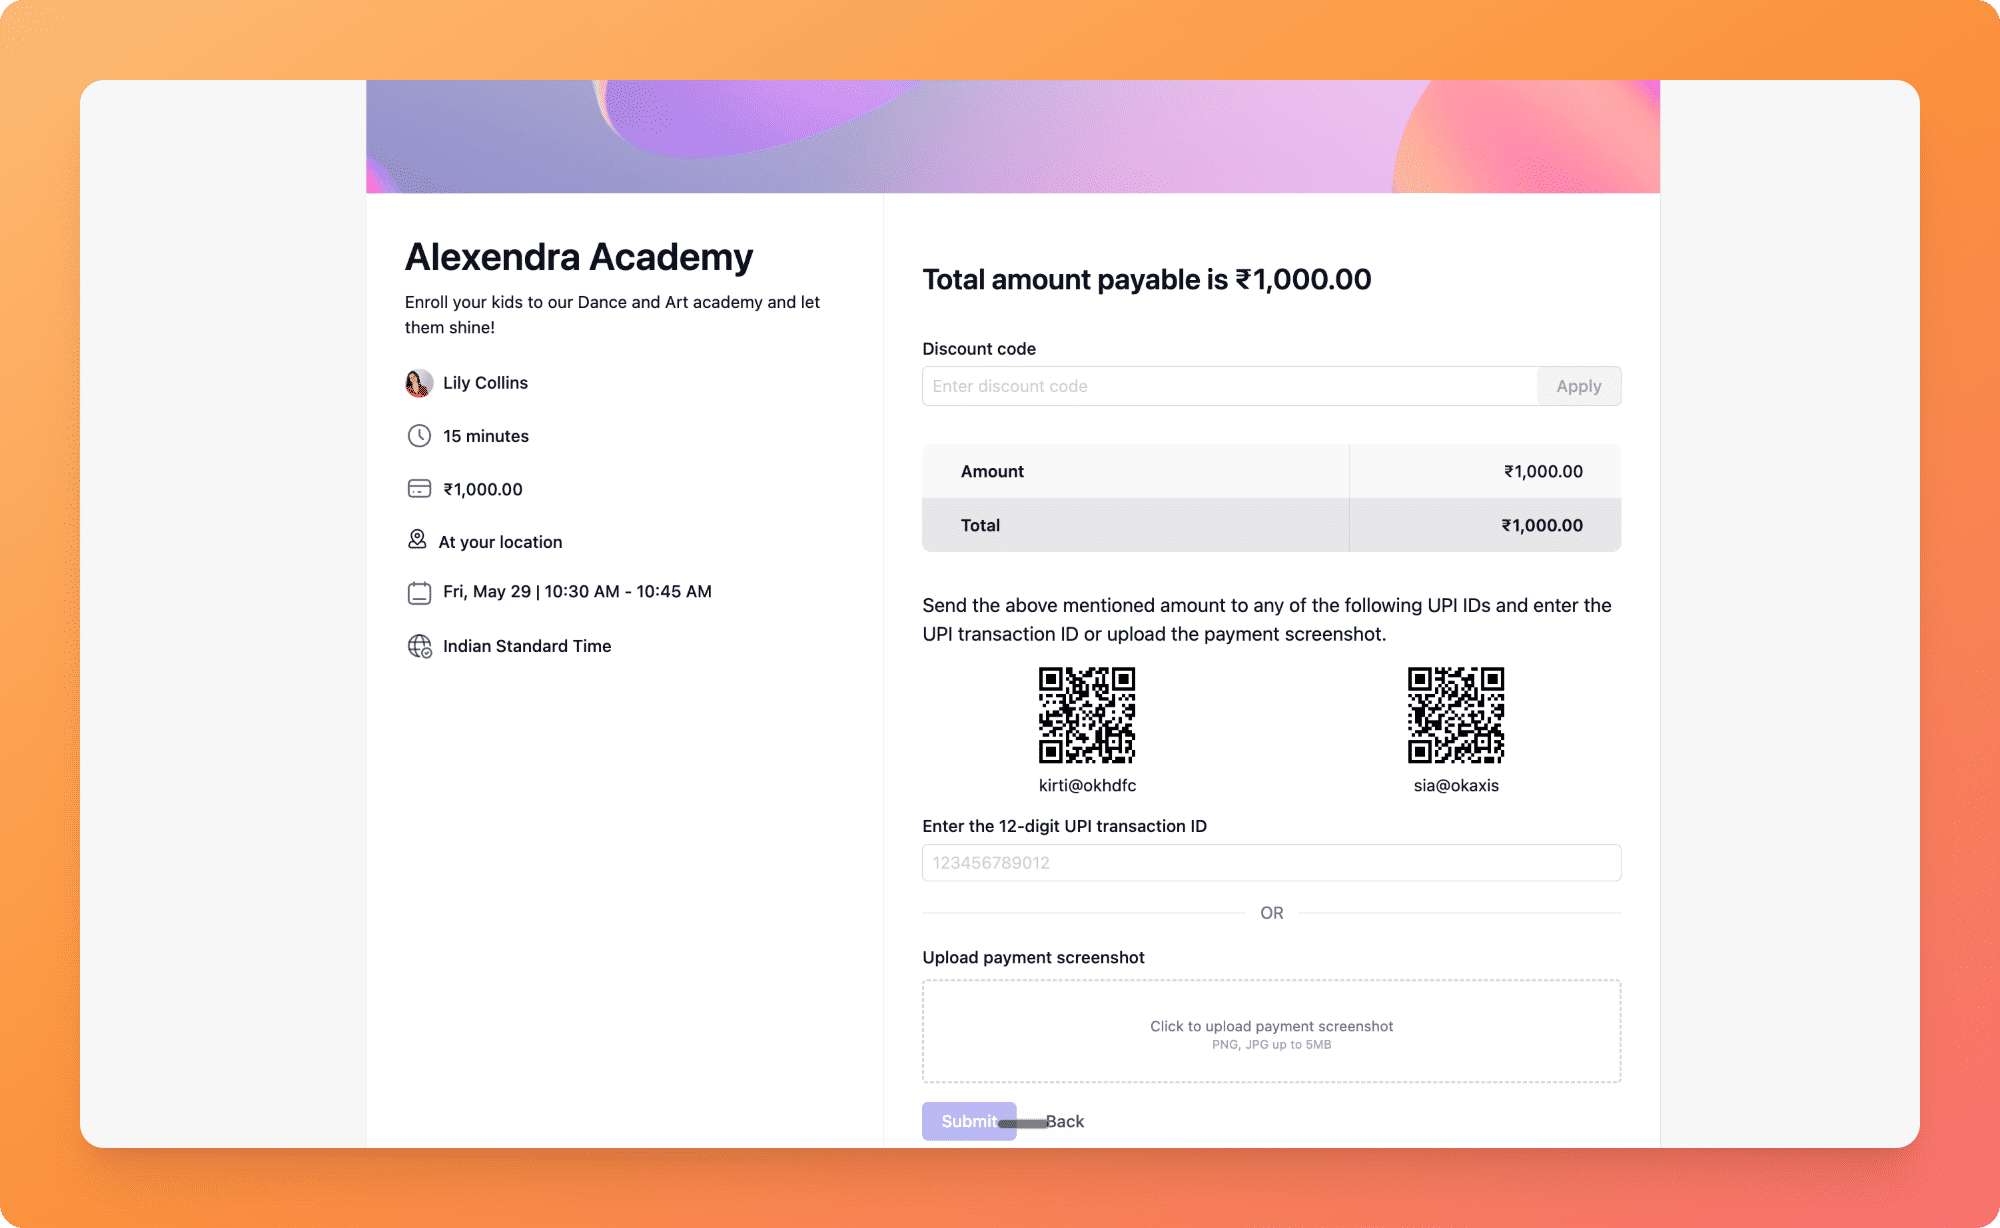
-
After selecting your slot, you'll be directed to the payment page. Here, you have two options:
1. Scan the provided UPI QR code to complete the payment.
2. Enter the transaction ID of your UPI payment.
-
Choose any of the options and click on Submit.
Setting a price for the meetings
Go to Scheduling Links in the left sidebar.
Click the scheduling link for which you want to enable manual UPI payments.
Click on Settings tab
Click on Accept payment online card.
Enable Accept payment online.
Choose UPI as the payment method.
Enter the price you want to set for your service.
Click on Save changes.
Confirming Payment
Go to My bookings in the left sidebar.
Click on meeting time link for which you want to confirm payment.
Right side pane will appear.
Click on Confirm payment button.
Verify the entire UPI transaction ID.
By default, you will see Payment received UPI id is chosen that was set in the scheduling link.
Once verified, click on Confirm payment.
Once confirmed, the payment status will be updated to Paid for that meeting.
You can also view successful payments in the Payments section.