
NeetoCal integrates with Stripe to let you accept payments through various payment modes on your booking pages. Once connected, NeetoCal automatically displays all payment methods you've enabled in your Stripe dashboard including, cards, Google Pay, Apple Pay, ACH Direct Debit, BECS Direct Debit, Klarna, iDEAL, and more.
You don't need to configure anything on the NeetoCal side. Simply enable the payment methods you want in your Stripe account, and they'll appear for your clients based on their region and the transaction currency.
Connecting your Stripe account
Go to Host (Self) tab.
Click on Stripe Standard payment card.
Click on Connect Stripe.
Fill out the questions that Stripe asks and submit the details.
You'll be redirected back to NeetoCal.
You should see the message Your Stripe account is successfully connected to NeetoCal.
Click on Finish.
Payment methods
NeetoCal automatically displays all payment methods you've enabled in your Stripe dashboard. This means you're not limited to a fixed set of options, any payment method you activate in Stripe will appear on your booking pages automatically.
The payment methods shown to your clients are determined by three factors:
Your Stripe dashboard settings - Only methods you've enabled will appear.
Transaction currency - Stripe filters out methods that don't support the currency being charged.
Client's region - Stripe shows only the methods available in the client's country. For example, BECS Direct Debit will only appear for clients in Australia, and UPI will only appear for clients in India.
Some commonly used payment methods include:
Cards — Credit and debit cards.
Google Pay — Available worldwide except in India.
Apple Pay — Available worldwide except in India.
ACH Direct Debit — For U.S. bank accounts.
BECS Direct Debit — For Australian bank accounts.
Klarna, Afterpay, iDEAL, Bancontact — And any other method supported by Stripe.
Check the full list of payment methods supported by Stripe.
Enabling payment methods in your Stripe dashboard
To enable or disable any payment method:
Click on Admin Panel from the left sidebar.
Click on Payment Integrations.
Click on Stripe Standard payment card.
Click on Manage Stripe button.
Click on the Dashboard button. Your Stripe dashboard will open in a new tab.
Click on the Settings icon at the top-right corner.
In the dropdown menu, select Settings.
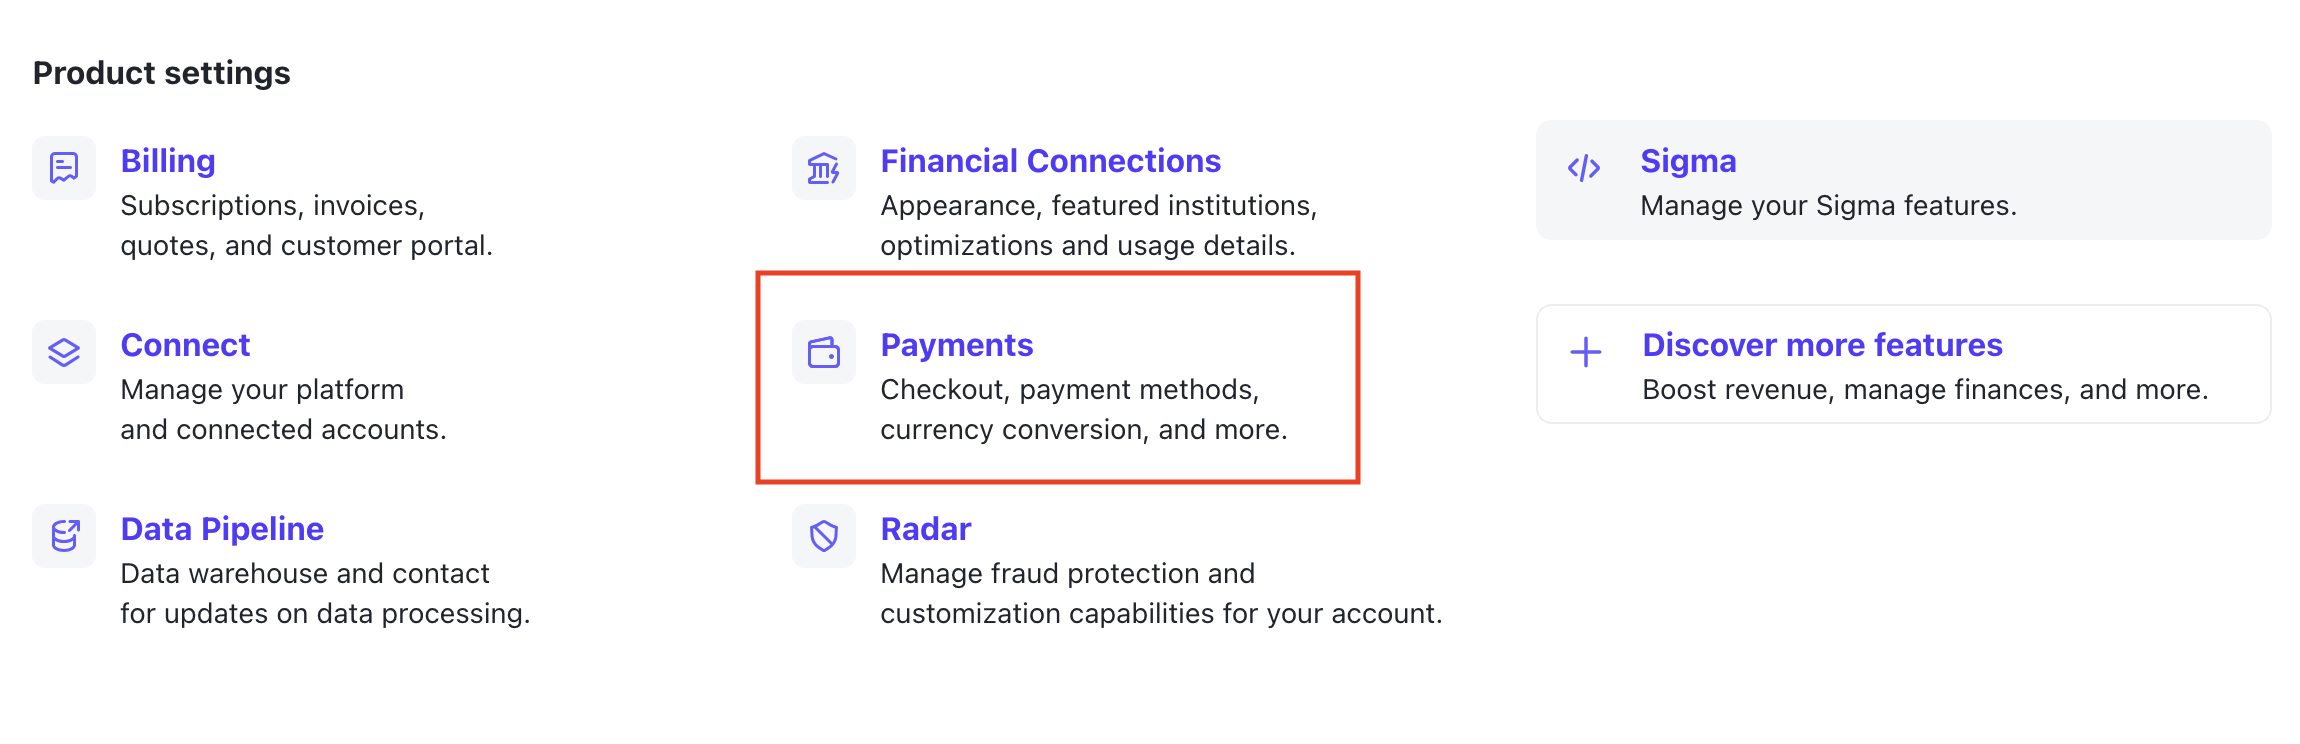
On the Settings page, find the Payments card under Product Settings.
Click on the Payments card.
Navigate to the Payment Methods tab.
Find the Payment Method Configuration section with the subtitle NeetoLLC Configuration and click on it.
From here, you can browse all available payment methods organized by category, Wallets (Google Pay, Apple Pay), Bank debits (ACH, BECS, SEPA), Buy now pay later (Klarna, Afterpay), and more. Click Turn On to enable a method or Turn Off to disable it.
Once enabled, the payment method will automatically start appearing on your NeetoCal booking pages for eligible clients, no additional setup needed on the NeetoCal side.
A note on delayed payment methods
Some payment methods like ACH Direct Debit, BECS Direct Debit, and PayTo are not instant, they can take a few business days to confirm. During this time, the booking will be held in a pending state. NeetoCal will automatically update the booking status once the payment is confirmed or if it fails.
A note on redirect-based payment methods
Some payment methods like iDEAL, Bancontact, and Klarna redirect your client to a third-party page to complete the payment. After completing the payment, the client is automatically redirected back to NeetoCal to see their booking confirmation.
Stripe Standard payment supported countries
NeetoCal supports all countries supported by Stripe, excluding Indonesia. Here is a list of countries that are supported by Stripe.
Adding address and phone number fields to the Stripe checkout
Click on Admin Panel from the left side panel.
Click on Payment Integrations on the left side panel.
Click on Stripe Standard payment card.
Click on Manage Stripe.
Enable the Billing address information to collect customer's address.
Enable the Contact phone number to collect the customer's phone number.
Using Google pay
Google Pay allows your customers to make payments using any credit or debit card stored in their Google Account. Stripe supports Google Pay worldwide, except in India.
You can issue partial or full refunds for successful Google Pay transactions, following the same process as card payment refunds. If a customer’s device does not meet the requirements, Stripe will not display Google Pay as a payment option.
Once your Stripe account is successfully integrated, NeetoCal will automatically activate the Google Pay payment method.
To verify whether Google Pay is enabled, follow the below steps:
Click on Admin Panel from the left sidebar.
Click on Payment Integrations.
Click on Stripe Standard payment.
Click on Manage Stripe button.
You can see your connected Stripe account details.
Click on the Dashboard button.
Your Stripe dashboard will open in a new tab.
-
Click on the Settings icon at the top-right corner.

In the dropdown menu, select Settings.
-
On the Settings page, find the Payments card under Product Settings.
Click on the Payments card.
Navigate to the Payment Methods tab.
-
Find the Payment Method Configuration section with the subtitle NeetoLLC Configuration and click on it.

Under the Wallets section, find the Google Pay option.
-
Check it's status:
If it is active, Google Pay is already enabled.
-
If it is inactive, you will see a Turn On button. Click on it to enable Google Pay.

To disable Google Pay, click on Google Pay to view its details, then select the Turn Off button on the right side.
Using Apple Pay
Apple Pay allows your customers to make payments using any credit or debit card stored in their Apple Pay. Stripe supports Apple Pay worldwide, except in India.
You can issue partial or full refunds for successful Apple Pay transactions, following the same process as card payment refunds. If a customer’s device does not meet the requirements, Stripe will not display Apple Pay as a payment option. Customers can use Apple Pay in iOS apps on iOS 9 and later, and on the web in Safari starting from iOS 10 and later or macOS Sierra.
Once your Stripe account is successfully integrated, NeetoCal will automatically activate the Apple Pay payment method.
To verify whether Apple Pay is enabled, follow the below steps:
Click on Admin Panel from the left side panel.
Click on Payment Integrations.
Find the Stripe Standard payment card and click on Manage Stripe button.
You can see your connected Stripe account details.
Click on the Dashboard button.
Your Stripe dashboard will open in a new tab.
-
Click on the Settings icon at the top-right corner.

In the dropdown menu, select Settings.
-
On the Settings page, find the Payments card under Product Settings.

Click on the Payments card.
Navigate to the Payment Methods tab.
-
Find the Payment Method Configuration section with the subtitle NeetoLLC Configuration and click on it.

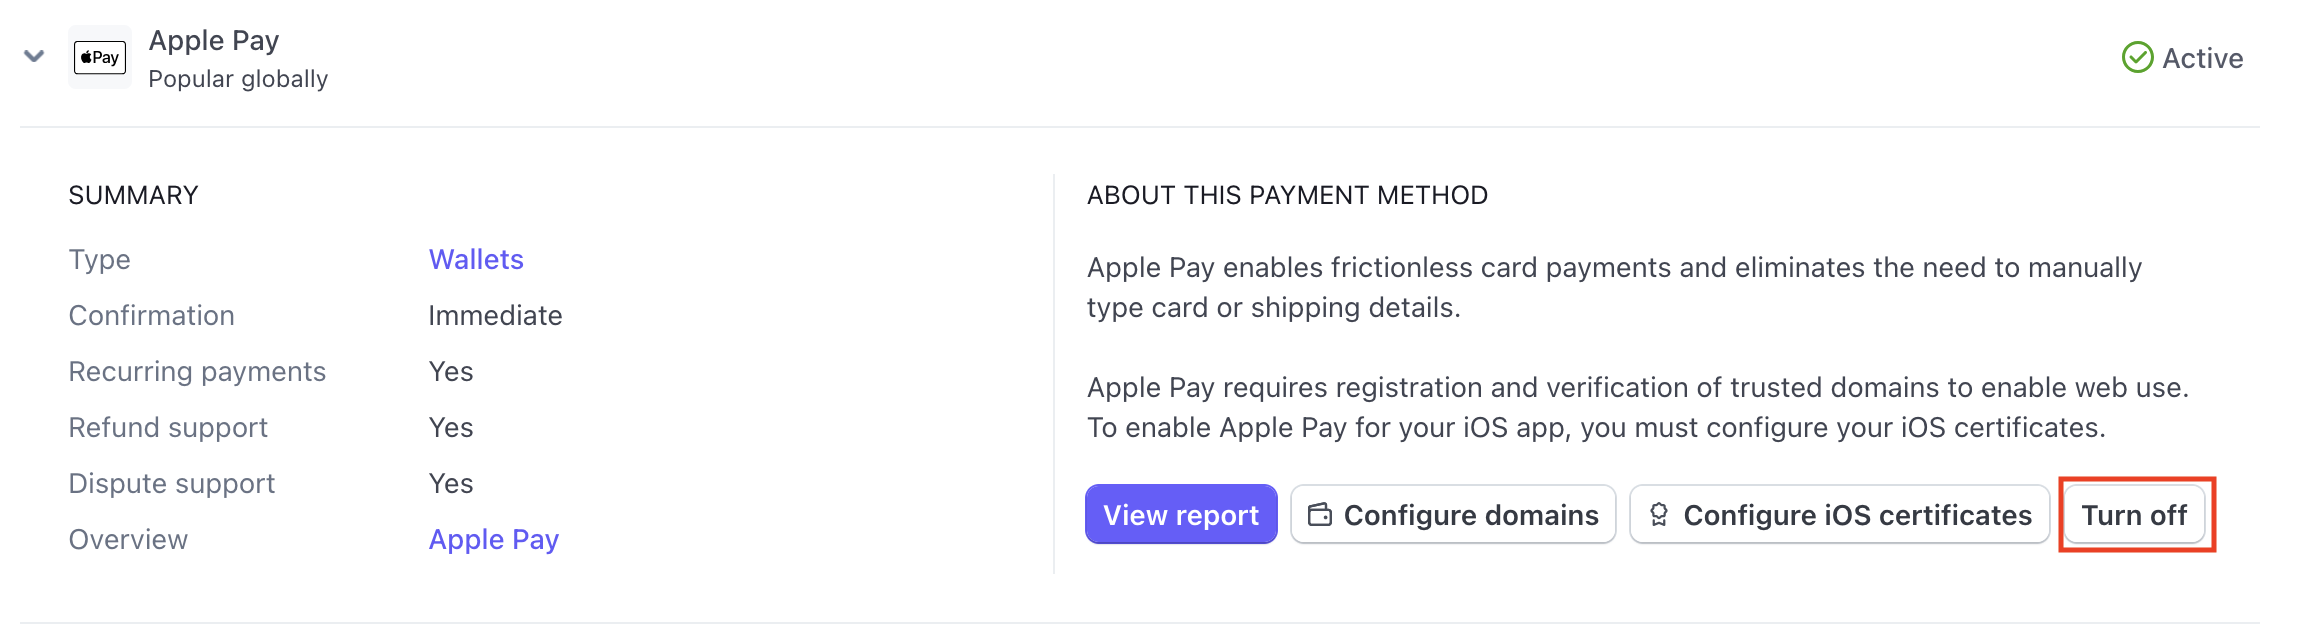
Under the Wallets section, find the Apple Pay option.
-
Check its status:
-
If it is active, Apple Pay is already enabled.

-
If it is inactive, you will see a Turn On button. Click it to enable Apple Pay.

-
-
To disable Apple Pay, click on Apple Pay to view its details, then select the Turn Off button on the right side.
Using ACH Direct Debit
You can make payments directly from your U.S. bank account using ACH (Automated Clearing House). This method is secure and can be used for future payments. Please note that it may take up to 4 business days to confirm whether the payment was successful. Because it's not instant, there’s a small chance the payment could fail during this time.
To verify whether ACH Direct Debit is enabled, follow the below steps:
Follow the same steps as above from 1 to 12 as mentioned for Google pay.
Under Bank debits section, find the ACH Direct Debit option.
-
Check its status:
-
If it is active, ACH Direct Debit is already enabled.

-
If it is inactive, you will see a Turn On button. Click it to enable ACH Direct Debit.

-
To disable ACH Direct Debit, click on ACH Direct Debit to view its details, then select the Turn Off button.