Before exploring Gmail integration to send emails, read the overview of sending emails from your domain.
If you don’t use Gmail or Outlook, you can still maintain your brand identity by sending emails from your own domain. NeetoCal allows you to connect a custom email provider by verifying your domain using DNS and DKIM records.
Once you connect your custom email provider same email be used for sending out notifications across all the scheduling links of the workspace like booking confirmation, reschedules, cancellation etc.
Go to Admin Panel tab.
Click on Send email from your domain.
Click on Custom email provider.
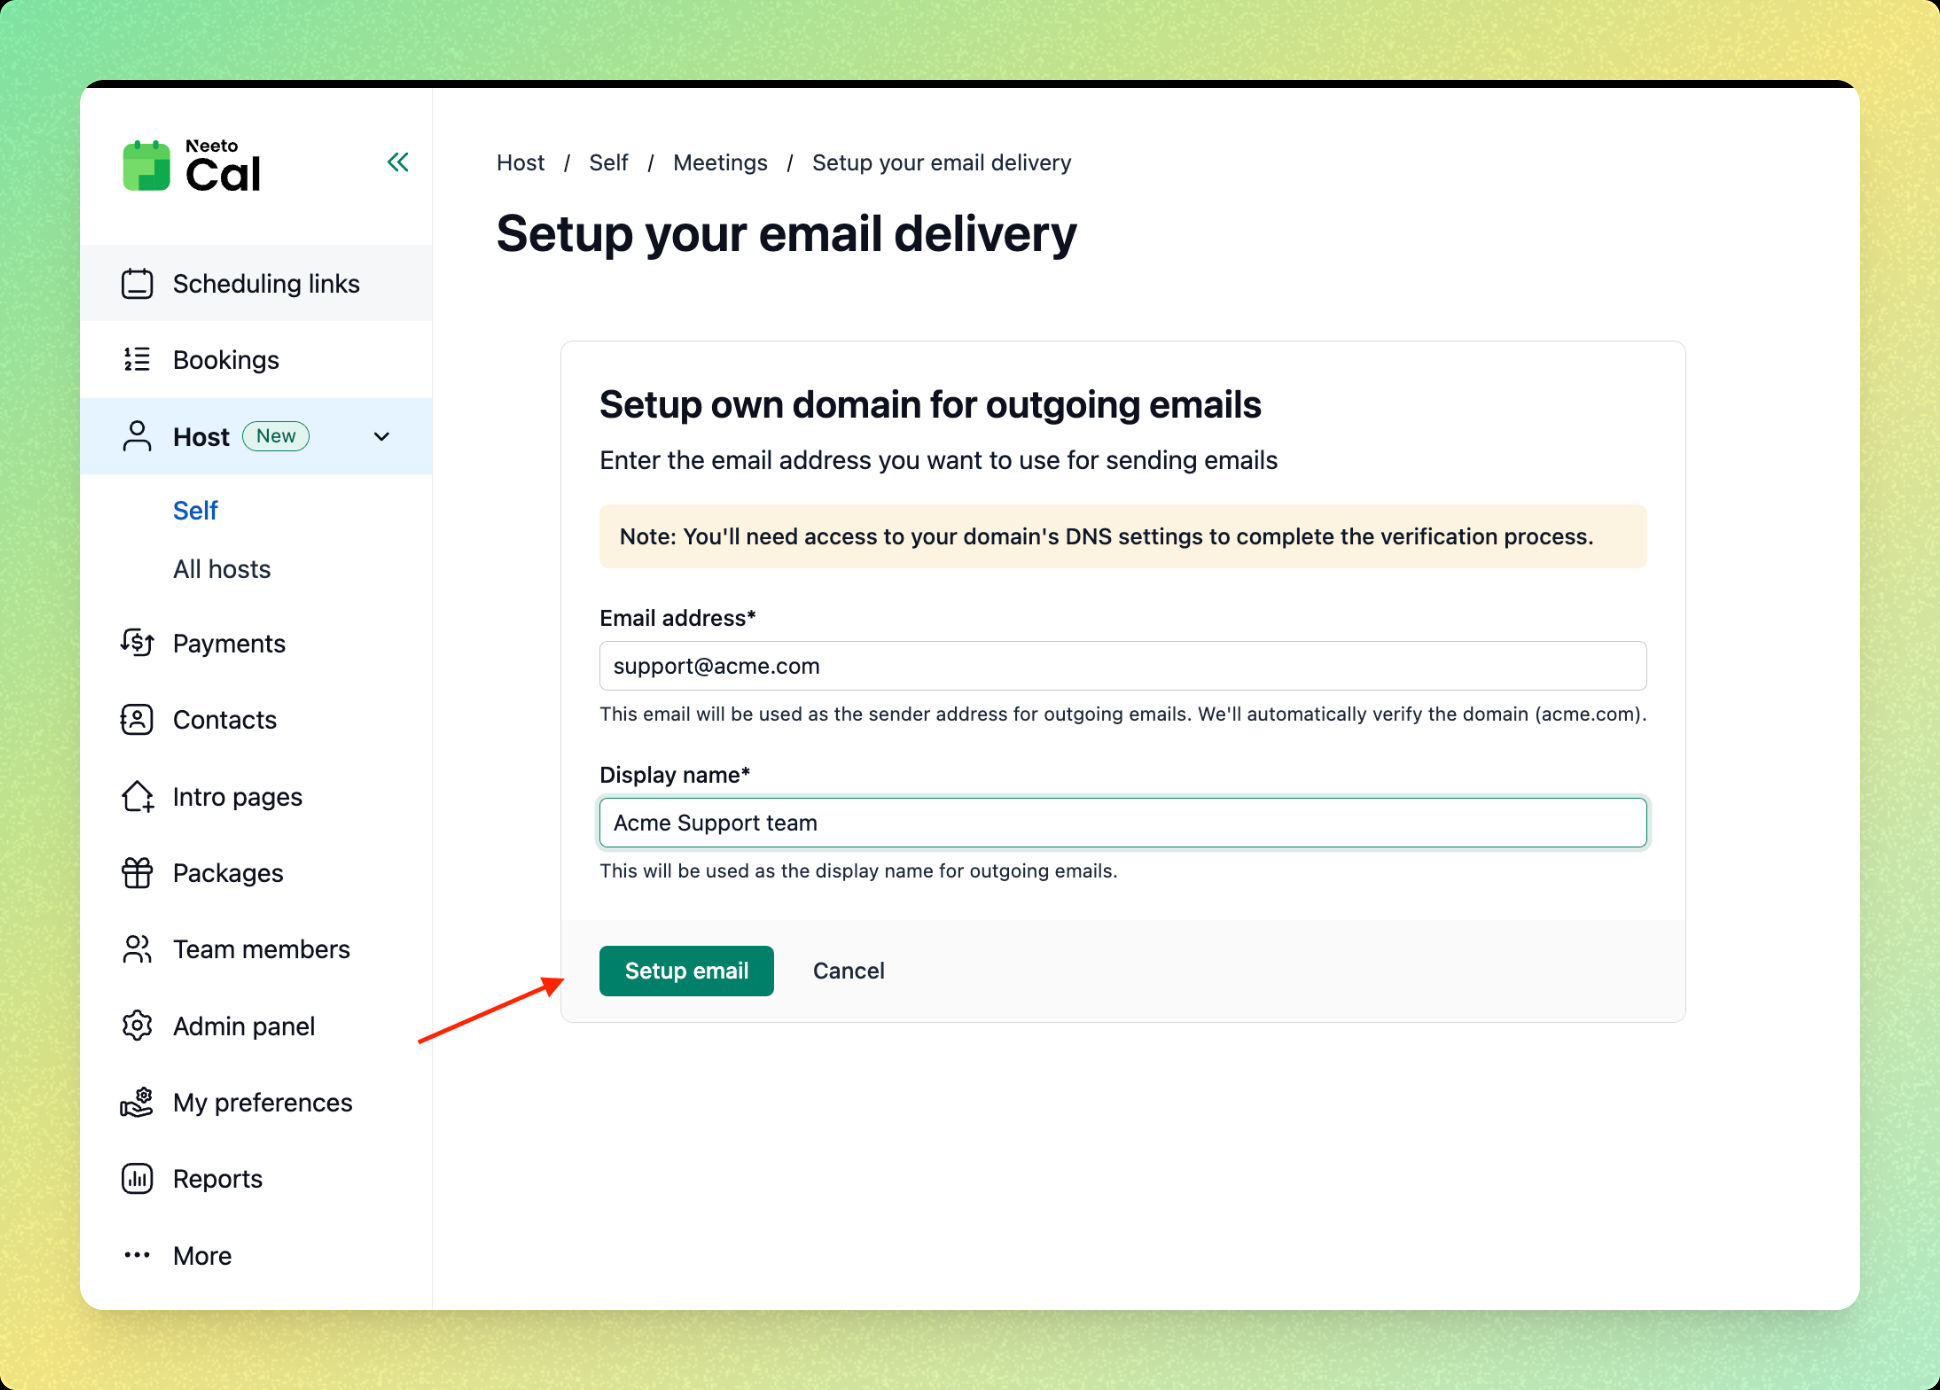
Click on Setup domain.
Enter the email address you want to use for sending emails. (for example:
[email protected])Enter a display name. This is the name your clients will see in their inbox.
-
Click on Setup email.
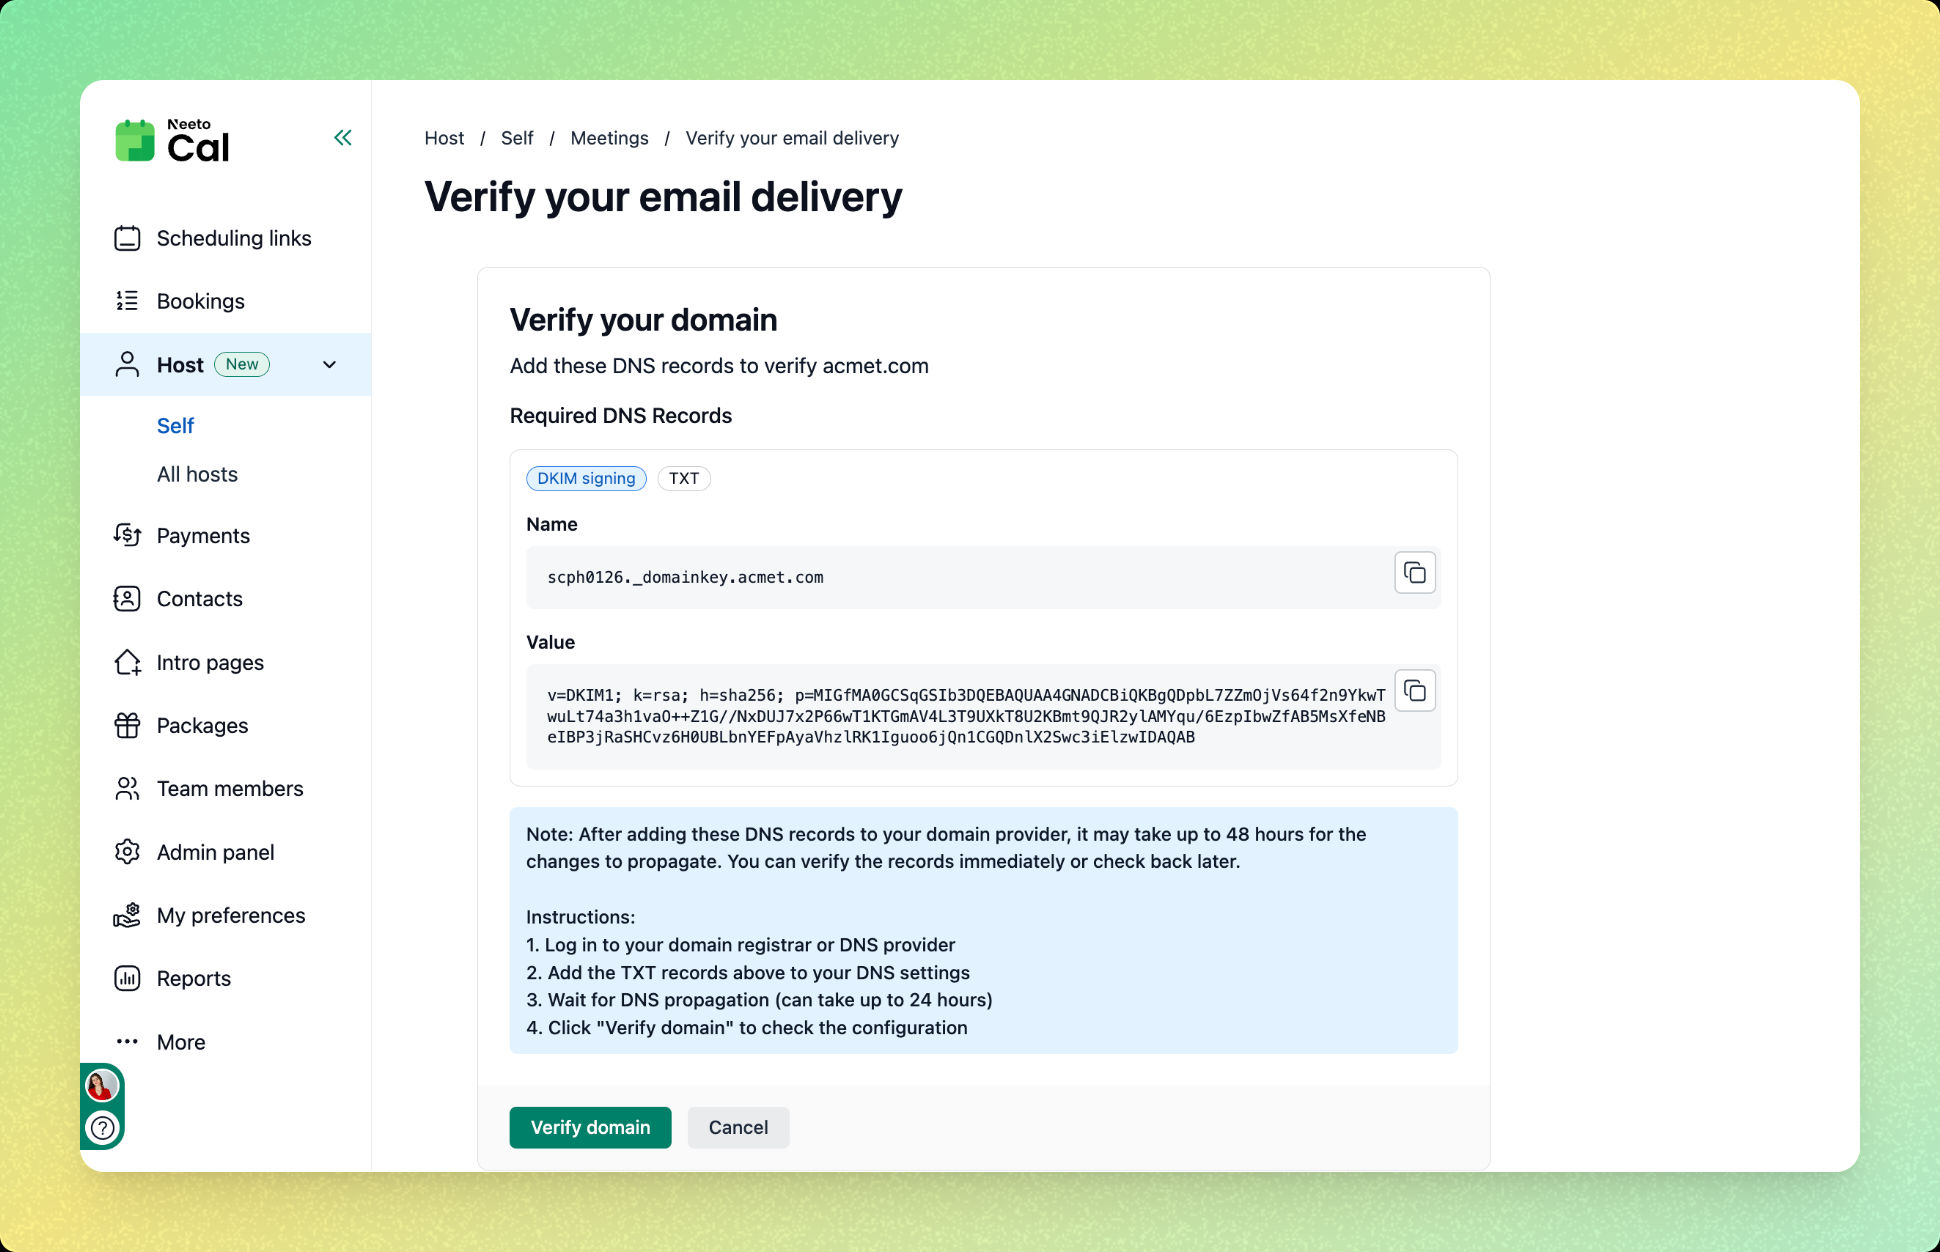
Verify your domain
After setting up the email, you’ll be taken to the Verify your domain screen.
On this screen, NeetoCal will show you the required DNS records (TXT records for DKIM signing).
Log in to your domain registrar or DNS provider.
-
Add the provided TXT record exactly as shown:
Name
Value
Save the DNS changes. DNS changes can take up to 24–48 hours to propagate, depending on your provider.
Once the DNS records are added, return to NeetoCal.
Click Verify domain.
-
If the records are detected successfully, your domain will be verified.