
NeetoCal automatically detects and displays the user’s local time zone by default based on their browser settings. However, some businesses take a different approach to scheduling appointments.
Instead of booking meetings directly on the NeetoCal booking page, clients book appointments via phone calls with virtual assistants who handle the scheduling process. Virtual assistants can be located anywhere in the world, which may cause confusion since NeetoCal displays booking slots based on the virtual assistant's location.
In these cases, virtual assistants are on call with clients, and clients clearly tell the virtual assistant which time slot they want.
Example: Scheduling for a therapist in Miami
Consider a Miami-based mental therapist who employs a virtual assistant in India to manage appointments. When a client calls to schedule a session, the virtual assistant in India logs into NeetoCal to book the meeting.
Without the Lock timezone feature, the system might display times in the virtual assistant’s local time (Indian Standard Time). However, with the feature enabled and set to Miami’s timezone, the appointment times will consistently appear in Eastern Time (Miami), ensuring that clients see the correct time relative to the therapist’s location.
Enabling lock timezone
Go to the Admin panel.
Click on the Lock timezone card.
Select the timezone you want to lock in.
Optionally, check Hide locked timezone on the booking page if you don't want customers to see the timezone at all.
-
Click on Save changes.
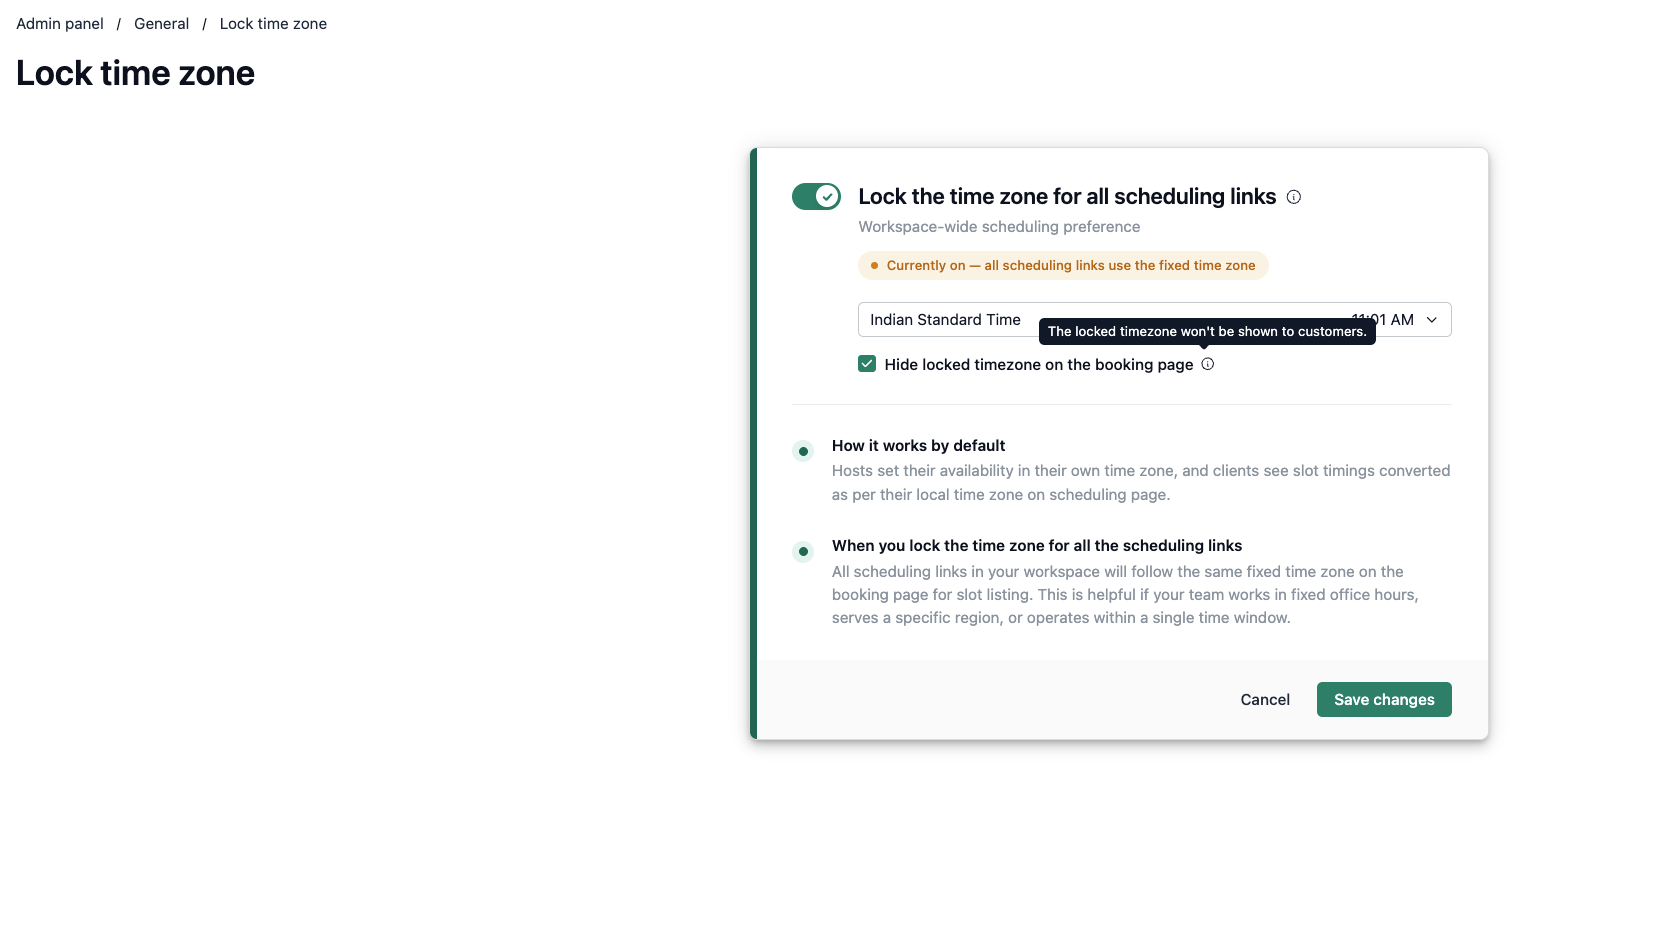
When a timezone is locked, the booking page shows times in that timezone to everyone, regardless of where they are. If you checked the hide option, the timezone itself is not shown on the booking page.
Override lock timezone
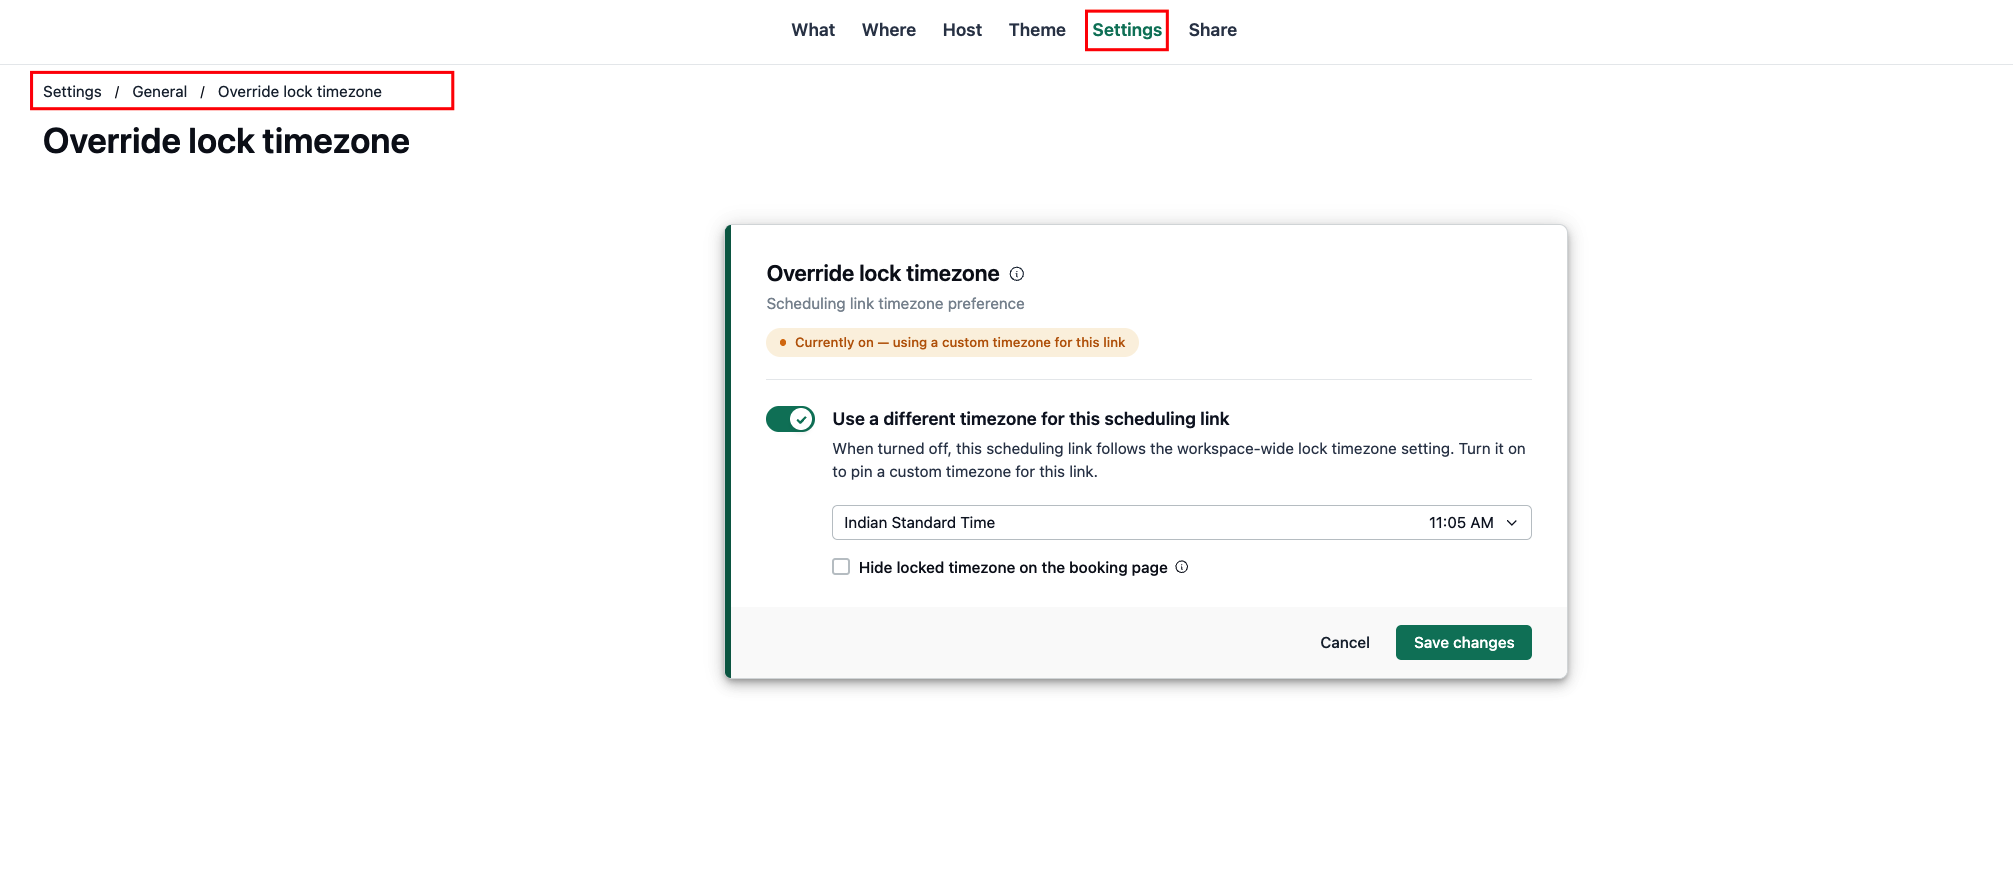
You can set lock timezone for all your scheduling links (globally) from the admin panel. For greater flexibility, you can also override this setting for a specific scheduling link, letting you customize the timezone as needed.
Visit your scheduling link page.
Go to Settings.
Click on Override lock timezone.
Enable Override lock timezone.
Select the timezone you want to lock on the booking page.
Optionally, check Hide locked timezone on the booking page.
-
Click Save changes.